
Method 1: Pause updates via Windows 10 Settings
Previously, only Windows 10 Professional users were allowed to pause Windows updates from the Settings app, but that changed with Windows 10’s May 2019 Update.
Now all Windows 10 versions can use the Windows Update settings to pause updates.
If you’re on Windows 10 Home, you can pause updates for up to 7 days and Windows 10 Professional users can pause updates for 35 days.
To pause updates on Windows 10, please follow these steps:
- Open Settings.
- Go to Update & Security.
- Click ‘Choose Advanced options’.
- Under the ‘Pause updates’ section, you will see a drop-down menu labeled ‘Pause until’. You can use this drop-down menu to select a date that you wish to pause updates to.
.jpg)
- Once done, you can close the Settings window for the changes to go into effect.
Windows 10 will no longer check for new updates until the selected date is reached.
Method 2: Pause updates via Windows 10 Group Policy
Unlike Windows 10 Home, Windows 10 Pro comes with Group Policy editor and you can use it to disable automatic updates permanently.
To pause Windows Updates with Group Policy editor, follow these steps:
- Search in the Start Menu for ‘gpedit.msc’ and select it when the result appears.
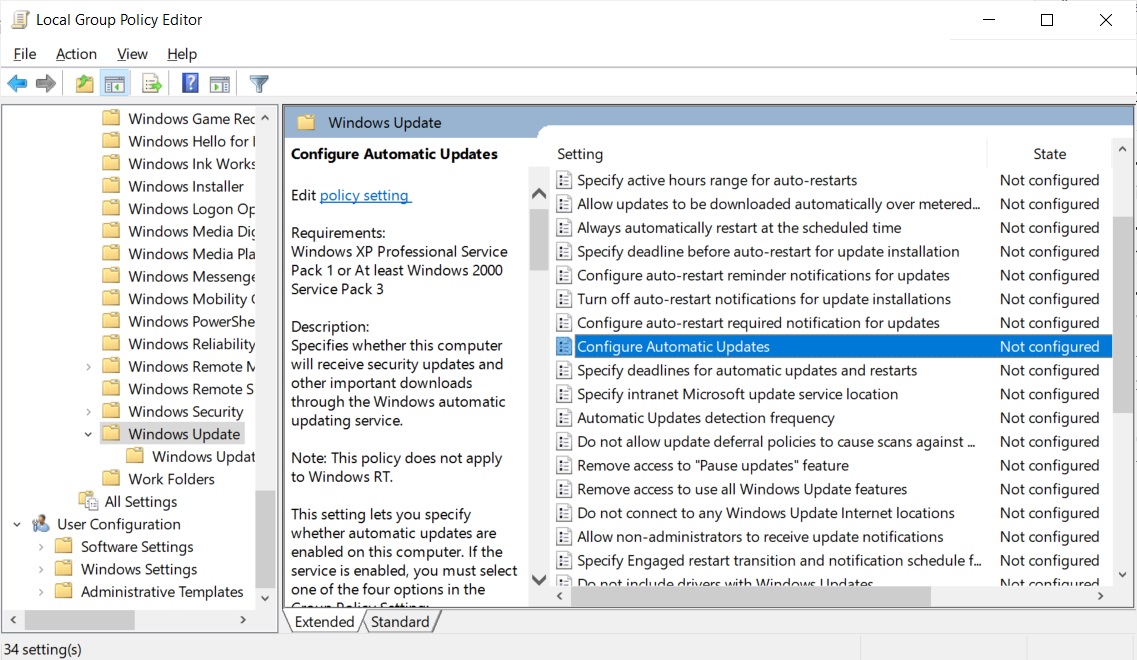
- When the Group Policy Editor opens, navigate to the following path: Computer Configuration\Administrative Templates\Windows Components\Windows Update
- Under the Windows Update section, you will see a policy called ‘Configure Automatic Updates’ as shown below. Double-click on the policy to open it.
- To disable automatic updates in Windows 10 for an unlimited period, set this policy to ‘Disabled’.
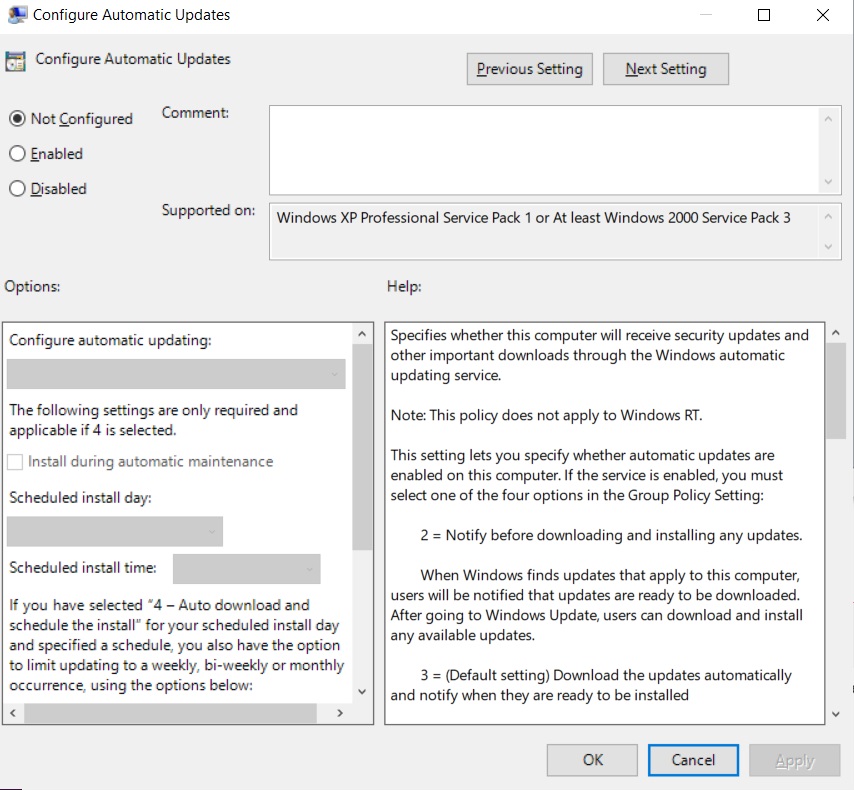
- When done, click on the Apply and then OK button to save the policy.
Windows 10 will no longer automatically install updates, but you can still manually check for updates and install them via Windows Update.
To enable automatic updates again, set this policy to ‘Not Configured’.
Method 3: Pause updates via the Windows 10 Registry
You can also manually create the above policy to permanently pause Windows 10 automatic updates for all versions of Windows 10 using the Registry Editor.
To pause Windows 10 automatic updates via the Registry, you would need to configure the following policy:
[HKEY_LOCAL_MACHINE\SOFTWARE\Policies\Microsoft\Windows\WindowsUpdate\AU]
“NoAutoUpdate”=dword:00000001
To do this via the Registry Editor, please perform the following steps:
- Open Windows Run (W+R) and type Regedit.
- In Registry Editor, navigate to the following path: HKEY_LOCAL_MACHINE\SOFTWARE\Policies\Microsoft\Windows
- Locate the Windows folder and right-click.
- Select New and then Key. When prompted to name the key, give it the name ‘WindowsUpdate’ and press Enter.
- Right-click this new key folder and click on New, then Key, and give the new key the name ‘AU’.
- On the right-side, right-click anywhere and select New > DWORD (32-bit) Value option and name the new value ‘NoAutoUpdate’.
- Double-click on the ‘NoAutoUpdate’ value and set its Value Data to 1.
- When done, the new values should look like the image below.
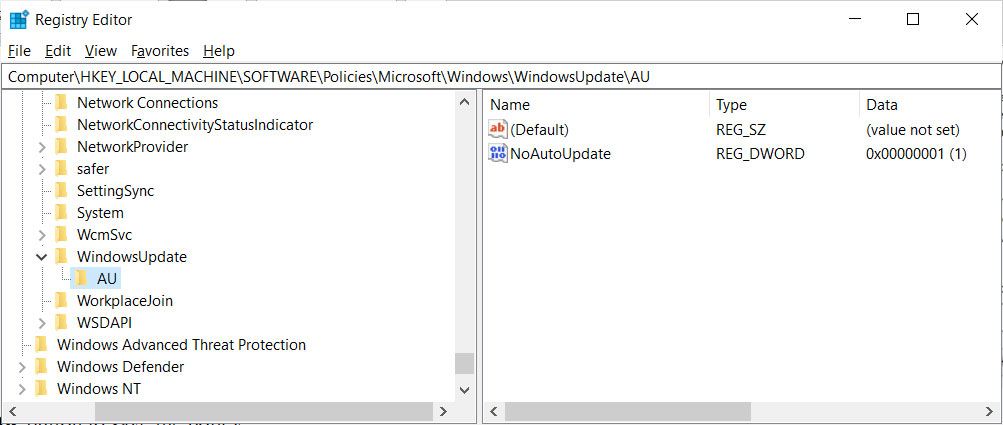 New NoAutoUpdate value
 - Click OK and restart the PC.
Windows automatic updates will now be paused permanently until you delete the NoAutoUpdate value.